


Ok, I'm sure we have all heard of PGP but no one really understands it right? Yeah that's how I was until I actual researched it.
In this article we will only talk about macOS, although it is all the same across most systems, some commands might be off by a few words or flags.
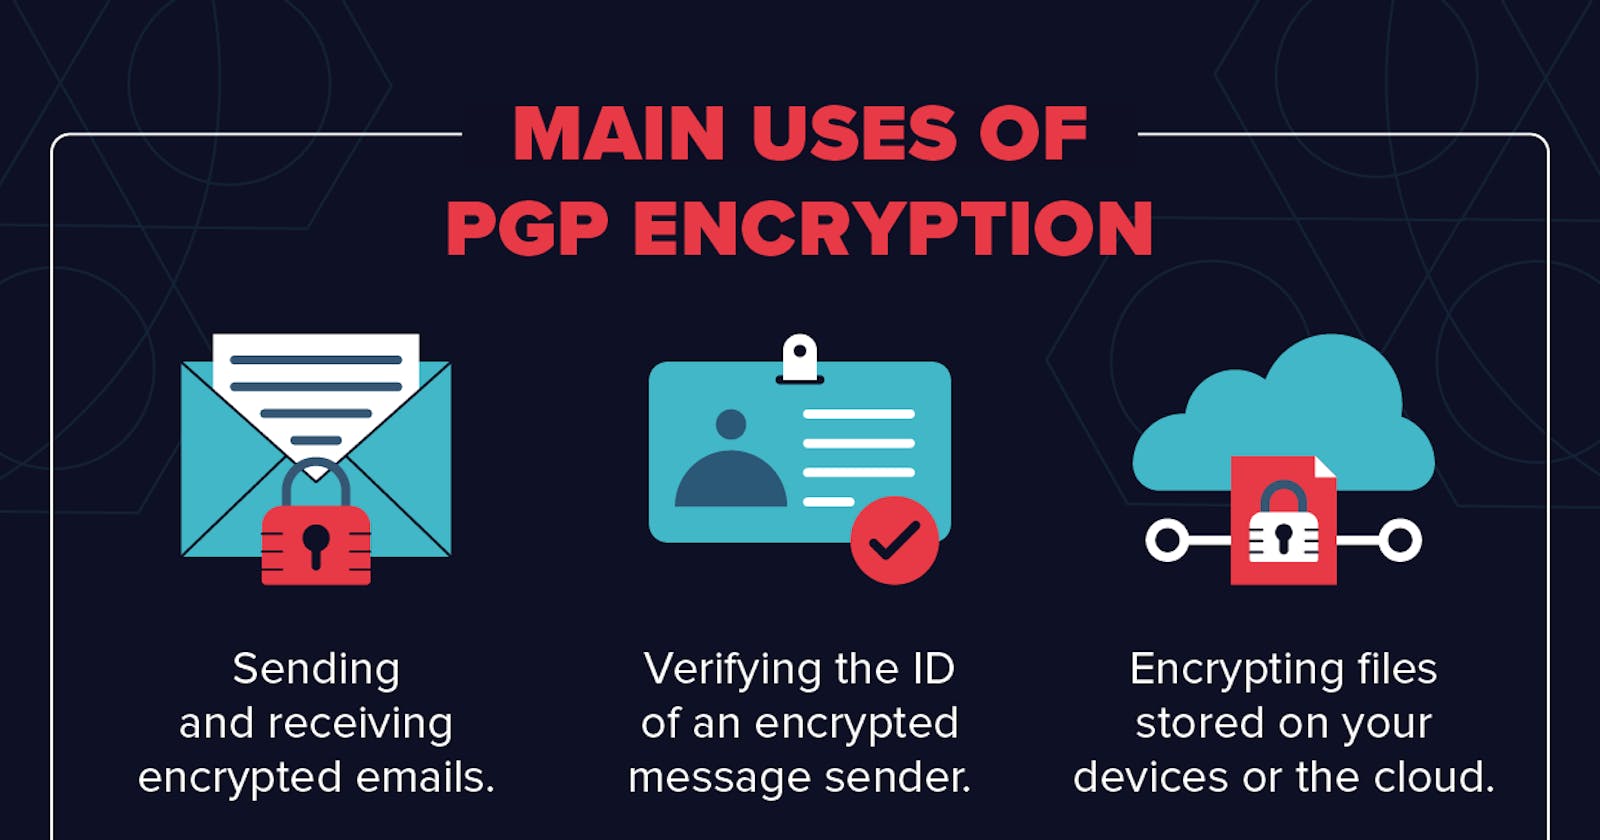
Explanation
PGP or Pretty Good Privacy, is just an encryption program that helps you cryptographically communicate and authenticate.
So, in easier terms, it is just a program that encrypts stuff.
PGP vs OpenPGP
When discussing PGP these days we almost always mean OpenPGP. This is an open-source 100% compatible clone of the original PGP, which is now closed-source software owned by Symantec.
Thanks to Pro Privacy for this explanation.
How does it work?
PGP works by generating two keys, these two keys are
- the private key, only you know and should never be public
- and the public key, anyone can know, not secret.
Someone can take your public key and and encrypt a message using their command line and send it to you. Using your private key, you decrypt this message. And vice versa with the other persons key.
Generating Your Key
First, you need to install PGP onto your computer,
Installing
To install PGP on macOS, just run:
brew install gpg pinentry-mac
from Brew
Setting up PGP
gpg --list-keys
This will setup its file structure and install other necessary stuff.
Creating Password
All you need to do is edit the $HOME/.gnupg/gpg-agent.conf file.
echo "pinentry-program /usr/local/bin/pinentry-mac" >> $HOME/.gnupg/gpg-agent.conf
This should prompt you with a popup asking for a password. Although it gives you the option to save in keychain, you shouldn't for security reasons. You have to remember this password. So write it down or store it on a hard drive.
Generating Keys
You can generate a key using
gpg --expert --full-generate-key
All the extra flags will cause it to prompt you with settings and input.
When prompted for a key type, select (8) RSA (set your own capabilities)
Next, you want to toggle off sign and encrypt capabilities, to do this, type s and press ENTER when prompted to turn off signing abilities.
Then, press e and press ENTER to turn off encrypt abilities.
Lastly, press q to save this information.
Now, when prompted for how long the key should be, you can type up to 4096, that is the highest it currently goes. The longer the key, more secure it is. I recommend the max at 4096.
For expiration, I suggest picking 0 this means it will never expire.
Next, to verify your identity, you should input your 100% real and legal name that your country knows you by. The same is with whatever email is your main email.
If you'd like, you can also put a comment on the key, this isn't required. So we suggest leaving it blank.
If everything looks good, hit o for okay.
After this, it will prompt you for a password, this is the password for the key. Keep this secure, long, and unique.
Exporting Keys
To export your private key you can use:
gpg --export-secret-keys --armor YOUR@EMAIL.COM > YOUR@EMAIL.COM.private.gpg-key
This key should NEVER leave you, this can be used to encrypt and decrypt secret messages.
To export your public key you can use:
gpg --export --armor YOUR@EMAIL.COM > YOUR@EMAIL.COM.public.gpg-key
This is public, people will use this to encrypt messages and send to you.
Revocation Certificate
Next, we will create a revocation certificate, this can be used to revoke the private key if it is ever compromised.
gpg --output YOUR@EMAIL.COM.gpg-revocation-certificate --gen-revoke YOUR@EMAIL.COM
This is how you can create and export PGP keys, if you have any trouble please comment and hopefully the community can help! You can also run pgp --help to get help on doing stuff with these keys!